Hello My Smitten's
Today for the finale I have an amazing women/blogger/newfound friend Renée from The Lite Side of Life. I came across Renée's blog via a link up that we were both on. I was immediately drawn to her fun spirit and her tutorial technique. I reached out to Renée and at last a blog friendship was born. We have so many neat ideas in store for you next year starting with an international polish swap like no other. Renée insisted that this mani for her guest post be a surprise so I will be seeing it for the first time with you. Well actually, I peaked at the pictures, and the intro, and the tutorial lol. Let me tell you it is awesome! Without further ado...
Linking up with The Nail Files
Linking up with The Nail Files
I was thrilled when Emma invited me to do a guest blog post for Subliminally Smitten, I couldn’t think of anyone better I would have liked to do my very first guest blog post for! I love reading her blog especially since she also has an obsessive penchant for everything nail polish related! When Emma asked me to do a guest blog post for her of course I immediately thought of nail polish and manicures, it’s our immediate common ground which has led to a fab blog friendship. I wanted to do a manicure for Emma that captured her spirit and the personality that is exuded through Subliminally Smitten! I hope I have nailed my mission (excuse the pun!) :)
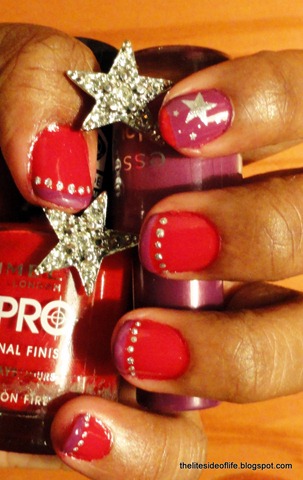
This mani is to represent her sparkly, bubbly personality and the fact that she seems to be the sort of person who is always shooting for the stars, has big dreams and is well on her way to achieving them while being elegant, classy and unique! This shines through in her awesome blog and I would just like to thank her for the invitation to guest post! :)
I decided to do an accent nail and do a stampy star design with coloured french manicure tips on all nails which is shadowed by a silver dotting design to accentuate the french tips. I used Sally Hansen Instant Strength x1 coat as a base coat, Essence Break Through x2 coats on index fingers (x1 coat for nail art), Rimmel Heart on Fire x2 coats on rest of fingers (x1 coat for nail art), Essence x1 coat in Stamp! me Silver for nail art and Essence Studio Nails Better than Gel Nails Top Sealer as a topcoat.
If you would also like to sport the 'Simply Subliminally Smitten Mani', read on to find out how!
You will need:
- Basecoat nail polish
- Base colour nail polish for index finger (I used purple)
- Base colour nail polish for rest of fingers (I used red)
- Nail Polish for nail art (stampy & dotting design, I chose silver)
- French tip guides or cellophane/sticky tape
- Orangewood stick/toothpick/dotting tool
- Topcoat nail polish
Method:
1) Apply base coat nail polish to all nails, wait for it to dry completely.
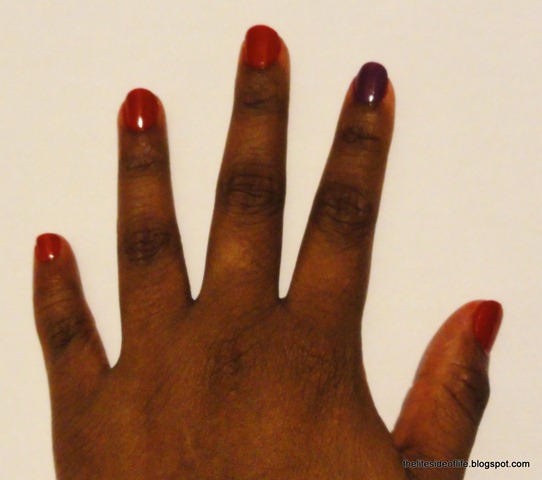
2) Apply x2 coats of purple nail polish to index nails and x2 coats of red nail polish to the remaining nails, wait for it to dry completely.
3) Now you will work on the stampy design, using a stamping set I selected a star design and stamped the design onto my index nails, I have described how to apply stampy designs more in detail here. Make sure when you are applying your chosen stampy design you leave adequate space at the tip of the nail to include a coloured french tip.
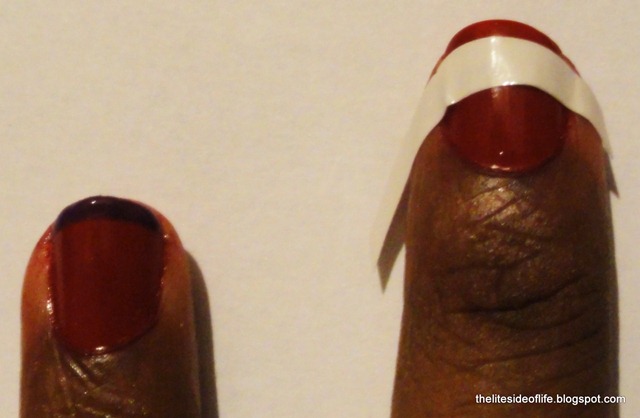
4) Now start working on the coloured french tips, I also alternated the colour of the french tips on the accent nail for extra effect (by having a red french tip on the index fingers and purple french tips on all other nails). I used french tip guides, but if you don’t have any, you can improvise by cutting thin strips out of cellophane/sticky tape and using it in place of french tip guides, I have done this countless of times and have still had excellent results!
5) Place the french tip guides on your nails and make sure you gently but firmly press it down onto the nail. On the index fingers paint a red french tip and paint on purple french tips on all the other nails.
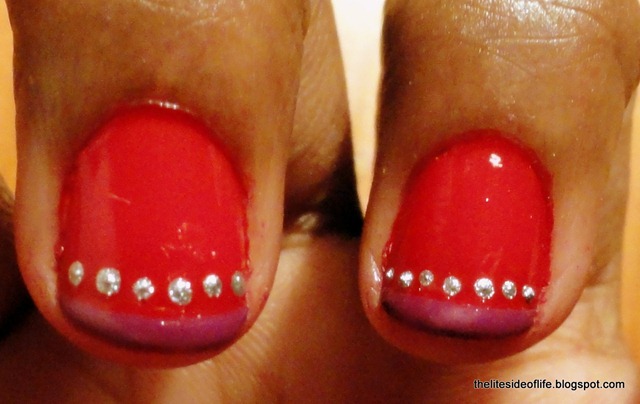
6) Wait for coloured french tips to dry completely, then start working on the silver dotting design that shadows the coloured french tips. Pour a small pool of silver nail polish onto a scrap piece of paper then dip the sharp end of an orangewood stick, toothpick or dotting tool into the nail polish then carefully apply the dots in a straight line just above the coloured french tips. Work on one nail at a time and complete the design on all nails except the accent nail.
7) Wait for all nail art to dry and then apply a top coat.
8) Totally be rocking your stunning 'Simply Subliminally Smitten mani'!
What type of mani would you do to represent yourself/blog ?


Ermegerd, that is FABULOUS!!! Awesome tutorial, too! They're SO PRETTY!!
ReplyDeleteMy personalized mani by Renee is pretty awesome huh? lol ;)
DeleteThanks for kind words Emma! You rock! :) Ahhh thanks so much Jennie! You should def try out the 'Subliminally Smitten' mani for yourself! Let us know how it goes! xxx
ReplyDeleteNo thank you Renee :)
DeleteIncredible nails! I just love the sparkles and the star details! Great guest post!
ReplyDeleteRebecca
www.winnipegstyle.ca
Thank you, I agree Renee did a fabulous job!
DeleteHi! I listed you for a Liebster Award on my blog! Go check it out!
ReplyDeleteOk thanks, I will :)
Deletelovely blog. i am following you
ReplyDeleteThank you very much for the follow :)
Deletehow cute! i love it!
ReplyDeleteThank you Tara.
DeleteOohh great job!
ReplyDeleteI agree, it is awesome!
Delete